Showing posts with label Embedded-Linux/Android. Show all posts

Building Android-x86 image with kernel customization

Android-x86 OS build

With kernel customization


Are you familiar with the Android x86 project? It's an open-source initiative that aims to port the Android operating system to run on traditional x86-based hardware And Run them Natively in laptops and desktop computers without any kind of emulation. You can then evolve your old laptops into an Education / Media Center / Gaming or even use them for Testing and Development of Android Apps on a Large Screen.

For a specific project I needed to build the Android sources for an x86 Target but the standard build process output had issues with Ethernet Drivers. It led me to customize the Android Kernel and Integrate the Ethernet Driver statically with the Kernel Build. Here in this post I will show How I managed to build an Android x86 OS variant with kernel customization. I hope you enjoy it 🙂

Host machine info 

~$ uname -a
Linux ayx-ThinkPad 5.0.0-29-generic #31~18.04.1-Ubuntu SMP Thu Sep 12 18:29:21 UTC 2019 x86_64 x86_64 x86_64 GNU/Linux


Install dependencies 

~$ sudo apt -y install git gcc curl make repo libxml2-utils flex m4
~$ sudo apt -y install openjdk-8-jdk lib32stdc++6 libelf-dev
~$ sudo apt -y install libssl-dev python-mako syslinux-utils
~/android-src/android-x86$ sudo apt-get install ncurses-devel libncurses-dev


Download the Source

~/android-src/android-x86$ repo init -u http://scm.osdn.net/gitroot/android-x86/manifest -b pie-x86
~/android-src/android-x86$ repo sync -j8


This will download all the source

Environment setup 


~/android-src/android-x86$ make clean
~/android-src/android-x86$ . build/envsetup.sh
~/android-src/android-x86$ lunch


Choose : “android_x86_64-userdebug”
The resultant build configuration would look like the following

============================================
PLATFORM_VERSION_CODENAME=REL
PLATFORM_VERSION=9
TARGET_PRODUCT=android_x86_64
TARGET_BUILD_VARIANT=userdebug
TARGET_BUILD_TYPE=release
TARGET_ARCH=x86_64
TARGET_ARCH_VARIANT=x86_64
TARGET_2ND_ARCH=x86
TARGET_2ND_ARCH_VARIANT=x86_64
HOST_ARCH=x86_64
HOST_2ND_ARCH=x86
HOST_OS=linux
HOST_OS_EXTRA=Linux-5.0.0-29-generic-x86_64-Ubuntu-18.04.3-LTS
HOST_CROSS_OS=windows
HOST_CROSS_ARCH=x86
HOST_CROSS_2ND_ARCH=x86_64
HOST_BUILD_TYPE=release
BUILD_ID=PI
OUT_DIR=out
============================================


Obtaining The Network card info 

~/android-src/android-x86$ lspci | awk '/[Nn]et/ {print $1}' | xargs -i% lspci -ks %


03:00.0 Network controller: Intel Corporation Centrino Wireless-N 2230 (rev c4)

Subsystem: Intel Corporation Centrino Wireless-N 2230 BGN

Kernel driver in use: iwlwifi

Kernel modules: iwlwifi

0c:00.0 Ethernet controller: Realtek Semiconductor Co., Ltd. RTL8111/8168/8411 PCI Express Gigabit Ethernet Controller (rev 07)

Subsystem: Lenovo RTL8111/8168/8411 PCI Express Gigabit Ethernet Controller

Kernel driver in use: r8169

Kernel modules: r8169


Take note of the network card’s kernel module names


Customization of the Kernel 

~/android-src/android-x86$ make -C kernel O=$OUT/obj/kernel ARCH=x86 menuconfig


Now the standard Linux kernel customization graphical interface in terminal will show up

[make sure your terminal is wide and long enough ]


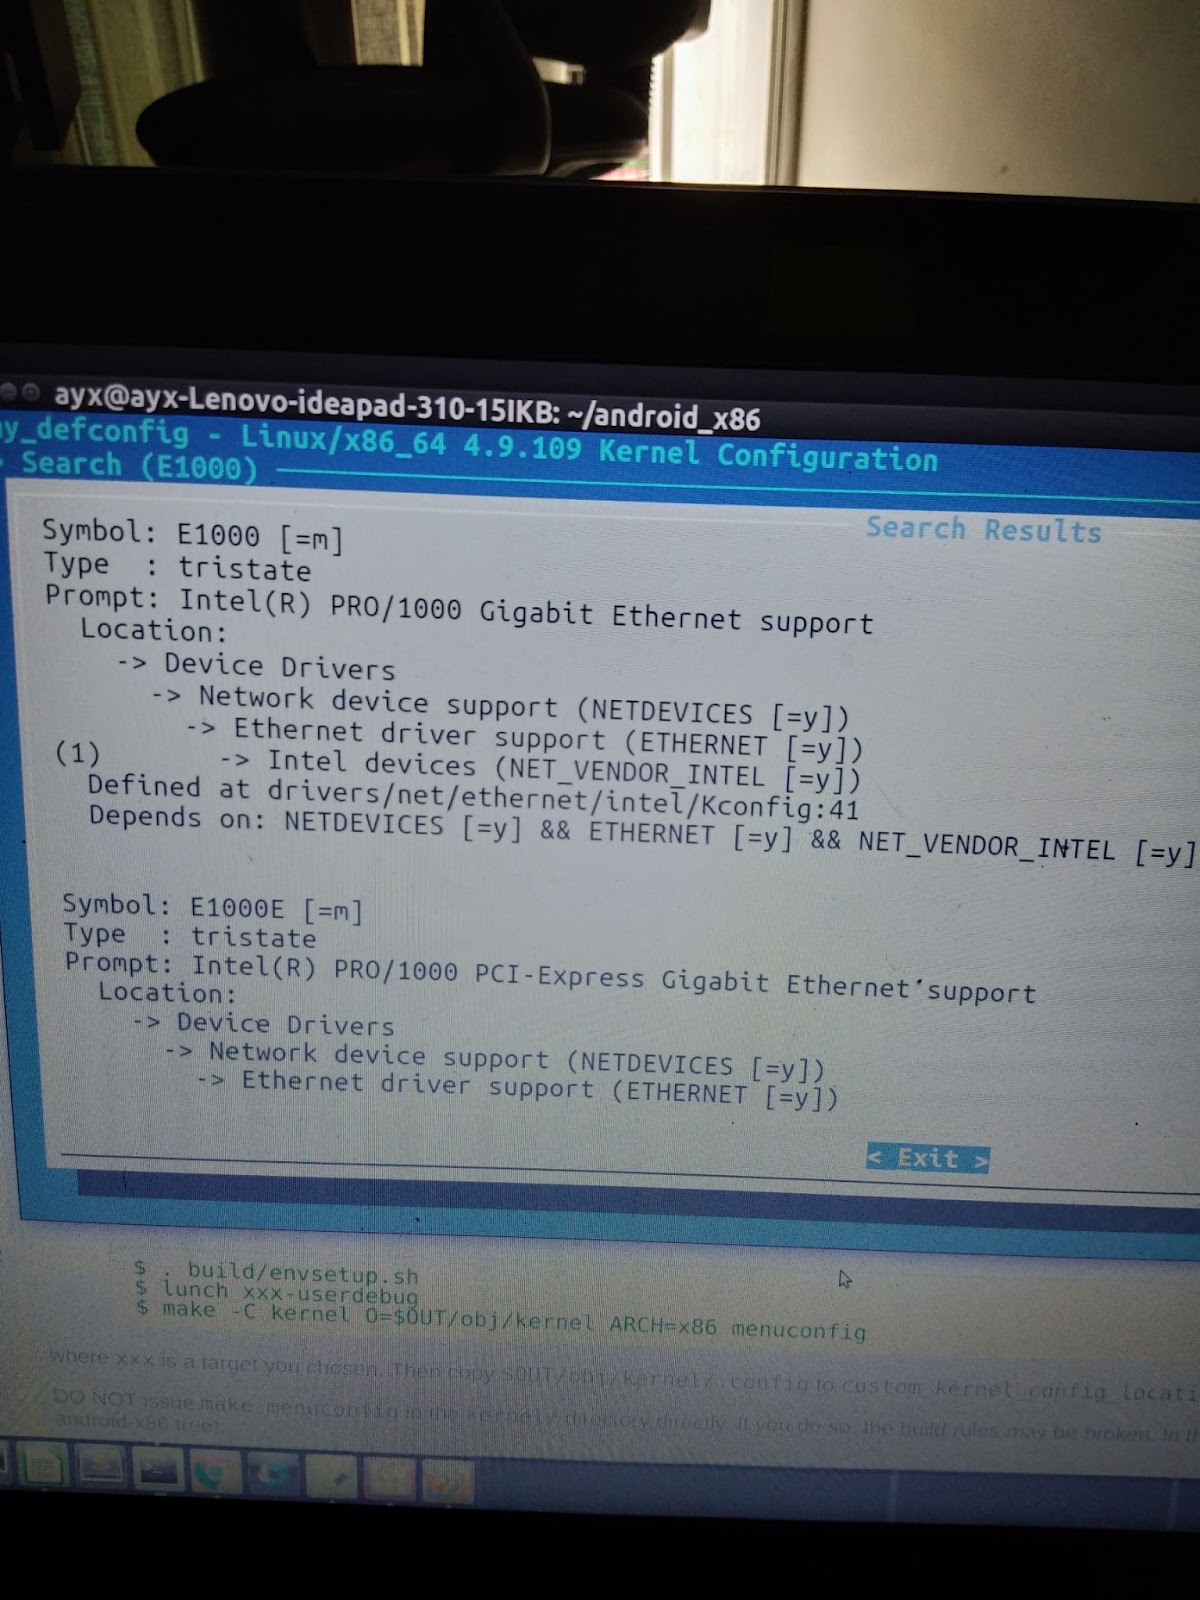
Note: The configuration file is the default .config

Browse to >Device Drivers > Network device support
  │<*>     Virtio network driver
Browse to >Device Drivers > Network Device Support > Ethernet Driver Support
  │<*>     Realtek 8169 gigabit ethernet support  


In a similar way you can change other parts of the kernel as you want

>> Now copy this config file to build systems’ actual config files’ location

~/android-src/android-x86$ cp out/target/product/x86_64/obj/kernel/.config kernel/arch/x86/configs/


>> Now rename the .config file

~/android-src/android-x86/kernel/arch/x86/configs$ mv .config my_x86_64_conf_20190923


~/android-src/android-x86$ nproc
8

>> Now build the kernel only

~/android-src/android-x86$ make -j8 kernel


The build took around 25 minutes
The built kernel is at out/target/product/x86_64/
The kernel modules are at out/target/product/x86_64/system/lib/modules/

>> Now we will build the final image with the kernel we just built

~/android-src/android-x86$ make iso_img -j8 TARGET_PRODUCT=android_x86_64 TARGET_PREBUILT_KERNEL=~/android-src/android-x86/out/target/product/x86_64/kernel


Total translation table size: 23151
Total rockridge attributes bytes: 10128
Total directory bytes: 24576
Path table size(bytes): 130
Done with: The File(s)                             Block(s)    342143
Writing:   Ending Padblock                         Start Block 342197
Done with: Ending Padblock                         Block(s)    150
Max brk space used 23000
342347 extents written (668 MB)

out/target/product/x86_64/android_x86_64.iso is built successfully.

#### build completed successfully (08:51:29 (hh:mm:ss)) ####


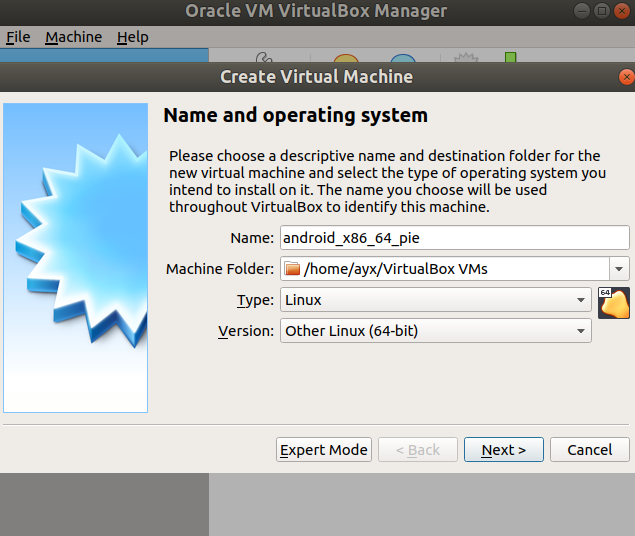
Android-x86 installation on VM 


Open Virtual Box >> Create new machine , choose linux type , create a virtual disk


From Settings -> storage -> Select the ISO you built

Now boot the machine , select installation of hard disk , Use GPT to write partition table


Create a partition out of the free space of the VDI , format by EXT4 , then GRUB will be asked but GRUB won’t work on a GPT partitioned so MBR will be used
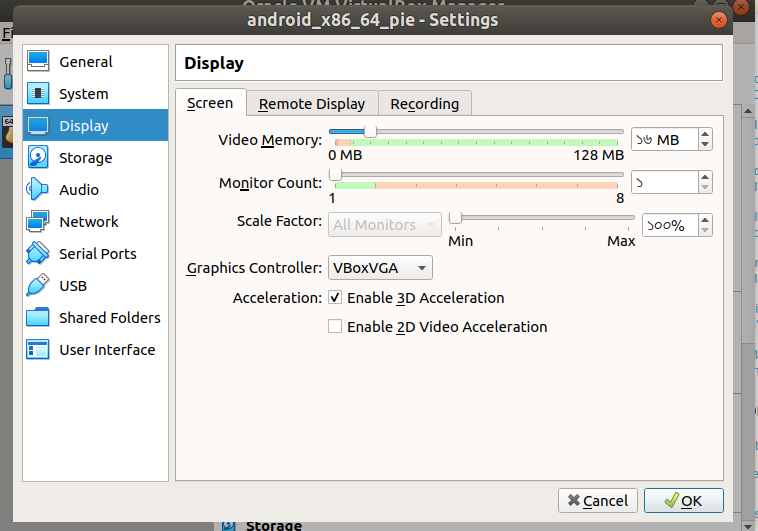
Enable 3D and 2D acceleration ,


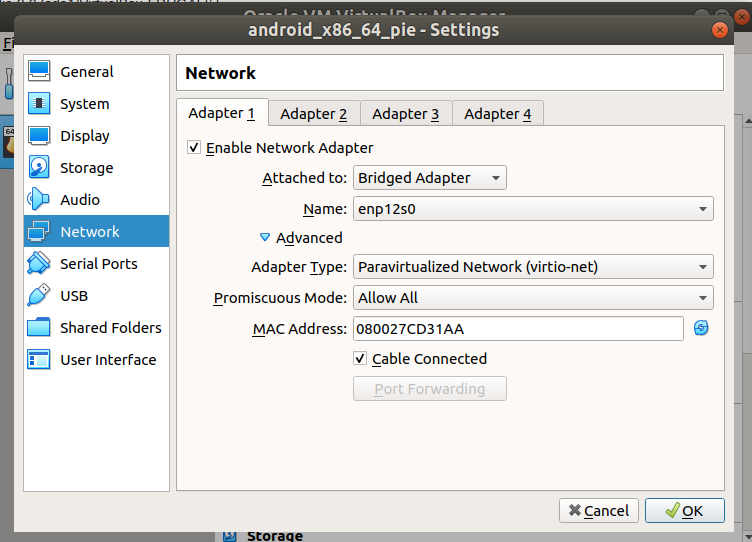
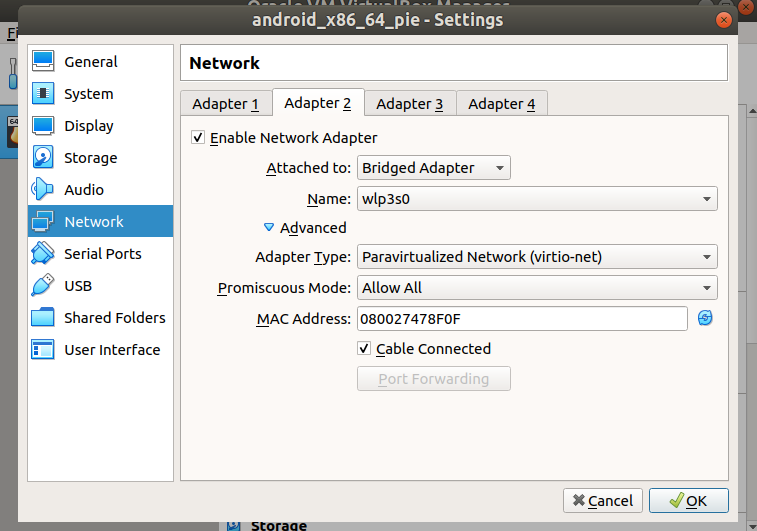
Network related Configuration


After installation completed remove iso attachment
Start the VM and you will see android x86 booting.

Installation in Laptop (Natively)  

Here below is snapshot of the custom build installation natively


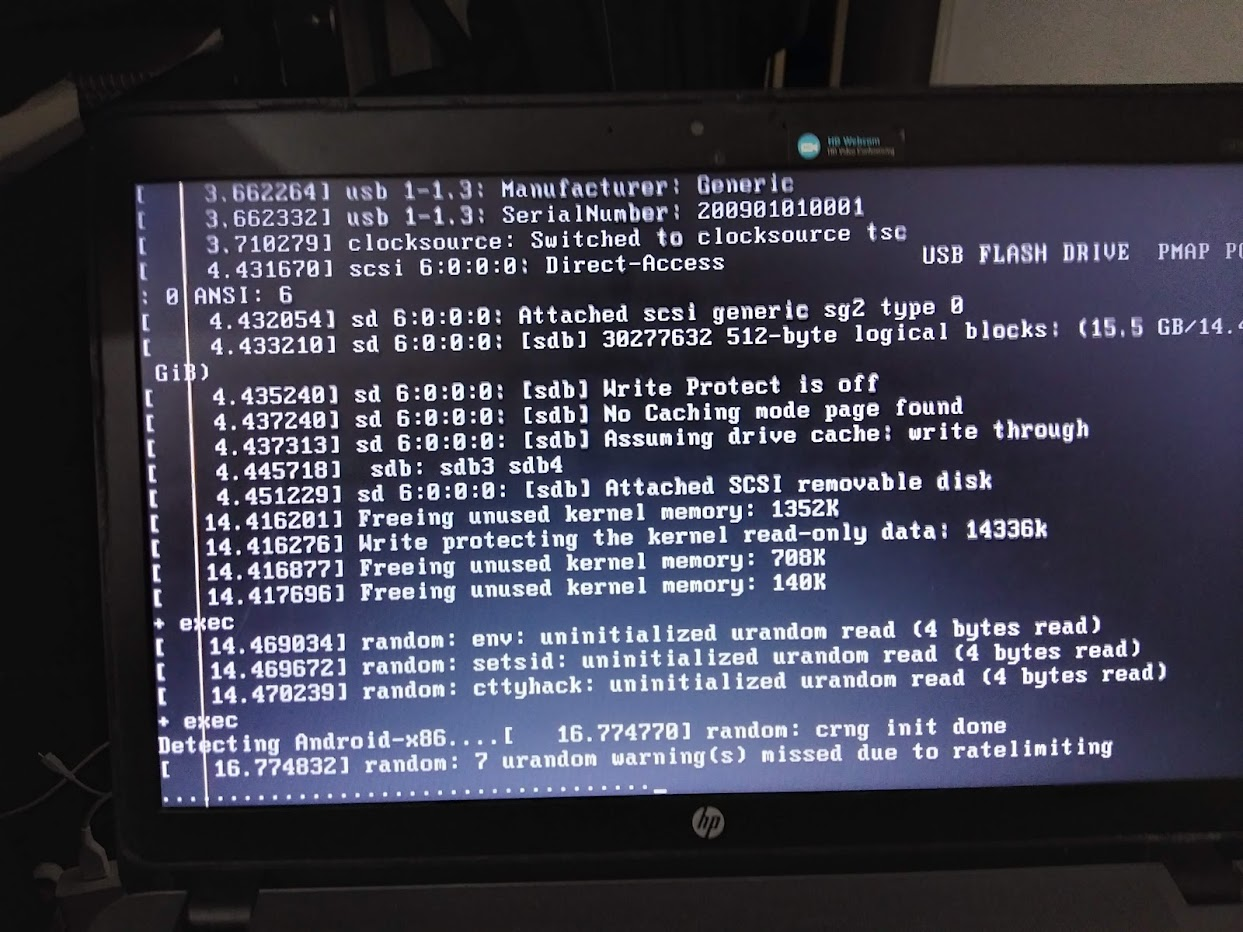
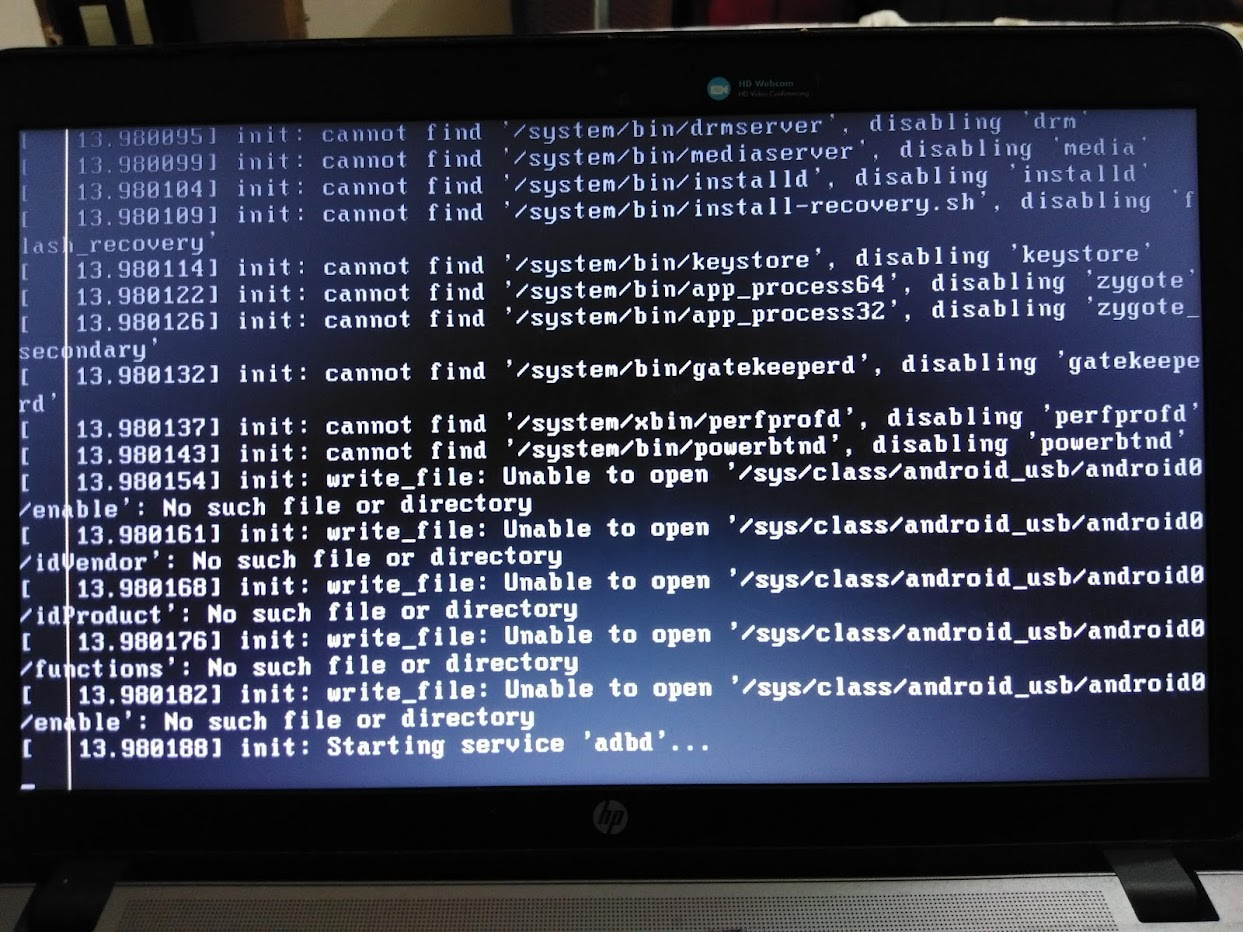
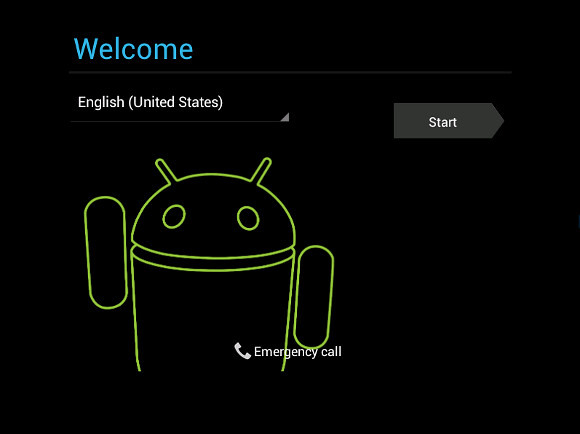
You can see all the services being started and finally the Android Screen will come up


Here is a screen out of the running OS . Please Note you would not find any google Apps with this build because you then need to be registered as a vendor and follow certain rules regulations. Otherwise you can install F-Droid kind of free app stores to download and play with different apps https://f-droid.org/en/

Building AOSP image

If your embedded product is a touchscreen device such as a Kiosk/Smart TV/infotainment System that relies upon a custom Linux OS then you may have faced challenges in hardware driver support and maintenance of regular software/security updates. Maintaining a custom-built Embedded Linux is a costly task and requires expertise in building the OS and reliably providing OTA updates. 


Over the years Embedded Android has evolved into a much better Alternative. Here in this post, I want to share the basic steps to start building an AOSP project from scratch. This will later help if someone wants to build/port a custom Embedded Android stack for a particular hardware


Here I will be sharing how I downloaded Android AOSP sources and built an AOSP image for a Nexus 7 [2012] device. You can follow this approach to build AOSP images for your devices, for example, Nexus 5. So Let’s Start.

Device Information 

The Tablet device used here is the Nexus 7 (2012)

  • Product Name : grouper

  • Variant: grouper

  • HW version: ER3

  • Bootloader Version: 4.23


Environment Setup 


>install some required packages

ayx@ayx-HP:~$ sudo apt-get install git-core gnupg flex bison gperf build-essential zip curl zlib1g-dev gcc-multilib g++-multilib libc6-dev-i386 lib32ncurses5-dev x11proto-core-dev libx11-dev lib32z-dev ccache libgl1-mesa-dev libxml2-utils xsltproc unzip


ayx@ayx-HP:~/$ sudo apt-get install ncurses-dev


> install adb tool

ayx@ayx-HP:~/$ sudo apt-get install android-tools-adb


> Fix Udev permission error 

ayx@ayx-HP:~$ lsusb

check the vendor id left of the colon, e.g nexus 5


Open this file 

ayx@ayx-HP:~$ sudo gedit /etc/udev/rules.d/51-android.rules


Put the following at the bottom of the file and save

# Nexus 5 Google Inc
SUBSYSTEM=="usb", ATTR{idVendor}=="18d1", MODE="0666", GROUP="plugdev"


ayx@ayx-HP:~$ sudo chmod a+r /etc/udev/rules.d/51-android.rules
ayx@ayx-HP:~$ sudo service udev restart
ayx@ayx-HP:~$ fastboot -l devices
ayx@ayx-HP:~$ sudo service udev restart
ayx@ayx-HP:~$ sudo udevadm control --reload-rules
ayx@ayx-HP:~$ sudo udevadm trigger
ayx@ayx-HP:~$ fastboot -l devices

> install Java 7

ayx@ayx-HP:~$sudo apt-get install -f
ayx@ayx-HP:~$sudo add-apt-repository ppa:openjdk-r/ppa
ayx@ayx-HP:~$sudo apt-get update
ayx@ayx-HP:~$sudo apt-get install openjdk-7-jre


select java 7 for the followings

ayx@ayx-HP:~$ sudo update-alternatives --config javac
ayx@ayx-HP:~/$ sudo update-alternatives --config java
ayx@ayx-HP:~/$ sudo update-alternatives --config javap


> Check versions of the following

In my cases, these were the versions 


gcc

5.4

Python

2.7

make

4.1

git

2.7.4

javac

7

java


> install repo tool

ayx@ayx-HP:~/$ mkdir ~/bin
ayx@ayx-HP:~/$ PATH=~/bin:$PATH
ayx@ayx-HP:~/$ curl https://storage.googleapis.com/git-repo-downloads/repo > ~/bin/repo
ayx@ayx-HP:~/$ chmod a+x ~/bin/repo


Download AOSP sources & Build Image  

> Download The Source

ayx@ayx-HP:~$mkdir ~/aosp_work
ayx@ayx-HP:~$ cd aosp_work/
ayx@ayx-HP:~/aosp_work$ ulimit -S -n 1024


> Configure Git account

Replace “ ” marked text with yours  

ayx@ayx-HP:~$git config --global user.name "your_user_name"
ayx@ayx-HP:~$git config --global user.email "your_mail"


> checkout Lollipop 

ayx@ayx-HP:~/aosp_work$ repo init -u https://android.googlesource.com/platform/manifest -b android-5.1.1_r1


ayx@ayx-HP:~/aosp_work$ repo sync -j4


Wait for the sources to be downloaded 


> Find your Device variant

ayx@ayx-HP:~/aosp_work$sudo adb devices
ayx@ayx-HP:~/aosp_work$sudo adb reboot-bootloader
ayx@ayx-HP:~/aosp_work$sudo fastboot oem unlock


Now in the FASTBOOT bootloader Mode, you will see the VARIANT and other device-related info printed, take note of those. THIS IS THE MOST IMPORTANT THING TO NOTICE


> Download The Device binaries

then go to https://developers.google.com/android/drivers And download the latest binaries for your variant, e.g. for GROUPER variant considering the OS version you want to build. Take note of the branch


extract the binaries to the root of the source tree. For our case into the “aosp_work” folder. Then extract them


> extract the binaries [press ENTER then Space then type I ACCEPT to accept license]

ayx@ayx-HP:~/aosp_work$ ./extract-asus-grouper.sh
ayx@ayx-HP:~/aosp_work$ ./extract-broadcom-grouper.sh
ayx@ayx-HP:~/aosp_work$ ./extract-elan-grouper.sh
ayx@ayx-HP:~/aosp_work$ ./extract-invensense-grouper.sh
ayx@ayx-HP:~/aosp_work$ ./extract-nvidia-grouper.sh
ayx@ayx-HP:~/aosp_work$ ./extract-nxp-grouper.sh
ayx@ayx-HP:~/aosp_work$ ./extract-widevine-grouper.sh


> setup cache for faster build

ayx@ayx-HP:~/aosp_work$ export USE_CCACHE=1
ayx@ayx-HP:~/aosp_work$ prebuilts/misc/linux-x86/ccache/ccache -M 100G
ayx@ayx-HP:~/aosp_work$ echo 'export USE_CCACHE=1' >> ~/.bashrc
ayx@ayx-HP:~/aosp_work$ . ~/.bashrc


> clean up

ayx@ayx-HP:~/aosp_work$ make clean
ayx@ayx-HP:~/aosp_work$ make clobber


>Apply Patches  

There will be a build error related to “uniqueptr” , and you have to rebuild again, so it is better to first apply the patch, follow this Stackoverflow post to patch this issue 


ref: https://stackoverflow.com/questions/19186629/fatal-error-utils-uniqueptr-h-no-such-file-or-directory-error


ref: https://stackoverflow.com/questions/36048358/building-android-from-sources-unsupported-reloc-43


ref: https://groups.google.com/forum/#!topic/android-building/b66T0PzDIiM


> build

ayx@ayx-HP:~/aosp_work$ source build/envsetup.sh
ayx@ayx-HP:~/aosp_work$ lunch


Choose “userdebug” option

ayx@ayx-HP:~/aosp_work$ make -j12


This build will use a prebuilt kernel from the vendor.

If everything is okay then the build will be successful 


Categories

Pages

Firmware Engineer

My photo
Works on Firmware, Embedded Linux, Smart Metering, RTOS, IoT backend

Contact Form

Name

Email *

Message *

Copyrighted by Hassin. Powered by Blogger.